Chronocrash Modders Tools

ChronoCrash Modders Tools 0.7.8

No permission to download
The way I currently see it :

1 / A GUI for binding. It will be similar to what already exist in CMT for defining attack boxes. By default this GUI doesn't write/convert anything to the text part. It is just an independent GUI. From there you can manually copy the values and manually fill your commands in the text part.

2 / But in the settings, you can also define a mask. The purpose of this mask is to connect the GUI part to the text part. For example
Code:
"@cmd bind {x} {y} {z} {frame} {direction}..."

Or you can simply use a comment mask to automatically log the values. For example :

Code:
"#bind values from CMT : x={x} y={y}....

Whatever you want. The point is that when you'll tweak the values in the GUI, in the text of your animation it will be converted as this mask with the {x], {y], etc automatically replaced by the actual values.

3 / CMT will also be able to recognize your mask in your existing animations and automatically fill the values in the GUI when you load an animation/frame in the visual editor. That way if you press play you can even preview the look of your animation.

(4 / If you use constants in your system, you'll be able to define them as well. For example if instead of the frame as a number, you use text constants that point to said numbers)

I probably won't support any particular system by default with the mask system, but if everything works as I described, with very little setup you'll be able to make it seamlessly compatible with almost any system.
 
That wasn't really what I meant by neutral. I'm saying it's not the job of an editor to promote any variation of @Bloodbane's scripts. Not mine either... or anyone else's.

There’s so many reasons why that's a bad idea I could write a ten page report and not cover them all. It's just one of those things that looks like an easy button but will cause more problems for you.

Having a script agnostic overlay viewer would be a really nice touch and useful for setting up grapples. You don't need to (nor should you) tie the editor to any set of scripts for that.

Just my input. It's @Piccolo's project. He can do what he wants.

DC
ok, my english limitations...

I see something that can work and that can help people.
Sure the newbies may feel strange since it's not meant to be a magic button to make slams.

I can't wait to give it a try! ^^
 
+1 to keeping it neutral as possible. It's not a good idea to make one person's script a de-facto standard. Also, the whole thought process of "grappling" is kind of provincial. What you're really asking for is overlay, which is something that's universal (grappling, particle effects, etc.).

DC
Actually it's not that complicated. Back in the days I did use bindings for slams in my mod (it had a lot of grapplers). As far as Modders Tools is concerned, visually editing a binding is not very different than visually editing an attackbox (which is already supported). So yeah I can add that no problem, the infrastructure is there.

I don't know the BloodBane system but as long as its commands can be translated in some kind of universal language, I can add any binding system.
I think this is nearly impossible, but it would be awesome to have some part of the software to visually handle the binding process of slams coding via BloodBane's slams' method/system.
But it would certainly be long and hard to code. (And some would say "not everybody use BB's slam system etc"

Sure it would skyrocket my main game project's coding part... Since I depend a lot on this system/script.

Something similar to the "throw maker" in Mugen's Fighter Factory...
Now I regret more and more The cretors gave up on adding Openbor support on their software ^^;
Those comments gave me this idea about having a visual summon in the visual character editor if a player, enemy, or any entity type uses it. For instance, the Sonic Boom projectile is set as load in the header of Guile.

Code:
name Guile
type player
health  100
gfxshadow    1
speed   10
icon data/chars/guile/icon.png 1
load Sonic-Boom
turndelay 9999999999999999999999999999999
death 2
nodieblink 3
nolife 1
palette data/chars/guile/idle01.png
alternatepal data/chars/guile/pal01.png

animationscript data/scripts/script.c

Visually, you can spawn Sonic Boom with a combo of custknife and throwframe, or a combo of spawnframe and custentity/subentity. Or either way around since the engine handles each command at a time.

Code:
anim    freespecial11 #Sonic Boom L
    delay    7
    offset    337 290
    @cmd stop
    throwframe 5
    custknife Sonic-Boom
    frame    data/chars/guile/cvs2_guile_387.png
    frame    data/chars/guile/cvs2_guile_388.png
    frame    data/chars/guile/cvs2_guile_389.png
    frame    data/chars/guile/cvs2_guile_390.png
    frame    data/chars/guile/cvs2_guile_391.png
    frame    data/chars/guile/cvs2_guile_392.png
    delay 2
    frame    data/chars/guile/cvs2_guile_392.png
    delay 7
    frame    data/chars/guile/cvs2_guile_393.png
    delay 2
    frame    data/chars/guile/cvs2_guile_393.png

Code:
anim    freespecial11 #Sonic Boom L
    delay    7
    offset    337 290
    @cmd stop
    spawnframe 5 10 0
    custentity Sonic-Boom
    frame    data/chars/guile/cvs2_guile_387.png
    frame    data/chars/guile/cvs2_guile_388.png
    frame    data/chars/guile/cvs2_guile_389.png
    frame    data/chars/guile/cvs2_guile_390.png
    frame    data/chars/guile/cvs2_guile_391.png
    frame    data/chars/guile/cvs2_guile_392.png
    delay 2
    frame    data/chars/guile/cvs2_guile_392.png
    delay 7
    frame    data/chars/guile/cvs2_guile_393.png
    delay 2
    frame    data/chars/guile/cvs2_guile_393.png

Hmm.. I wonder how summoning scripted projectiles in the visual editor is like. But I do worry about its messy outcome/result because scripts are customizable by design. Like, let's say using @cmd to summon a certain projectile as an example, instead of @cmd stop which is for velocity use to stop.

Code:
anim    freespecial11 #Sonic Boom L
    delay    7
    offset    337 290
    @cmd stop
    frame    data/chars/guile/cvs2_guile_387.png
    frame    data/chars/guile/cvs2_guile_388.png
    frame    data/chars/guile/cvs2_guile_389.png
    frame    data/chars/guile/cvs2_guile_390.png
    frame    data/chars/guile/cvs2_guile_391.png
    @cmd spawnAndThrow "Sonic-Boom" 80 0 70 1.1 0 0 #spawnAndThrow {projectilename} {x} {z} {y} {vx} {vz} {vy}
    frame    data/chars/guile/cvs2_guile_392.png
    delay 2
    frame    data/chars/guile/cvs2_guile_392.png
    delay 7
    frame    data/chars/guile/cvs2_guile_393.png
    delay 2
    frame    data/chars/guile/cvs2_guile_393.png
 
  • Like
Reactions: NED
fglayer/bglayer placement would be good, I'm interested in being able to completely visually design and layer up an entire level using your tool.
Ok will look into it later. But will probably need more input from the community as to what precisely need to be implemented. Also would be great if anybody provides examples of levels using these commands (fglayer / bglayer) in various ways so that I can use them as benchmark.


@maxman : I could implement projectiles preview but probably won't do it without a good reason. It's actually more work to implement projectiles (physics, various commands, etc) than bindings. And I don't think it would be useful ; but maybe I'm wrong ?
 
Ok will look into it later. But will probably need more input from the community as to what precisely need to be implemented. Also would be great if anybody provides examples of levels using these commands (fglayer / bglayer) in various ways so that I can use them as benchmark.
bglayer is always set behind. First bglayer is set the most behind if background is not set. The second bglayer comes at the front from the first one. It's layer after layer, but it stays as a background. I think bglayer is designed to be as a regular background layer to be behind other things and entities that exist. background is the most behind of all bglayers and fglayers. fglayer can be set behind or at the front of entities. It's designed to be as a foreground layer (look at Chun-Li's stage). However, bglayer and fglayer don't seem mandatory after testing without using them. Only a few mandatory uses for levels are panel, direction, and order. I can't remember if settime is a part of those.

Examples:
Ryu's stage:
Code:
#### PLEASE USE BOTH THESE IMAGES AS HUD FOR YOUR PLAYER(S) UNLESS IT'S BONUS STAGE #######
fglayer data/sprites/hud_base.png -1 1 0 3 3 1 1 1 1 1 0 0 0 0 0 0
fglayer data/sprites/hud.png -1 1 0 3 3 1 1 1 1 1 0 0 0 0 0 0
###########################################################################################

#### MAIN BG #########
#bglayer        data/bgs/ryu/0-4.png 0 0 0 -4 1 1 1 1 1 0 0 0 0 
bglayer        data/bgs/ryu/0-0.png 0.4365 0 0 -26 1 1 1 1 1 0 0 0 0 0 0
bglayer        data/bgs/ryu/0-1.png 0 0 0 -10 0 0 -1 1 1 0 0 0 0 0 0.83
bglayer        data/bgs/ryu/0-2.png 0 0 0 -30 0 0 -1 1 1 0 0 0 0 0 0.653
bglayer        data/bgs/ryu/0-3.png 0.17 0 0 73 1 1 1 1 1 0 0 0 0 0 0
#panel        data/bgs/ryu/0-4.png
#fglayer        data/bgs/ryu/0-4.png -23192761 0 0 0 -4 1 1 1 1 1 0 0 0 0 0 0
panel        data/bgs/ryu/0-4-ryu.png
#panel        data/bgs/ryu/0-4.png
bgspeed 7
order a
direction both

Ken's stage:
Code:
#Ken stage background by Aztec
#Stage coded by Max Man for Open Beats of Rage

#### PLEASE USE BOTH THESE IMAGES AS HUD FOR YOUR PLAYER(S) UNLESS IT'S BONUS STAGE #######
fglayer data/sprites/hud_base.png -1 1 0 3 3 1 1 1 1 1 0 0 0 0 0 0
fglayer data/sprites/hud.png -1 1 0 3 3 1 1 1 1 1 0 0 0 0 0 0
###########################################################################################

########## MAIN BG ##############

bglayer    data/bgs/ken/ken_0-2.png 0 0 0 -59 0 0 -1 1 1 0 0 0 0 0 3 #0.876 0 0 -59 0 0 1 1 1 0 0 0 0 0 0 # Sky and water
#bglayer data/bgs/ken/ken_98-1.png 0.813 0 0 -50 0 0 1 1 1 0 0 0 0 0 0 # Cloud
bglayer data/bgs/ken/ken_0-3.png 0.655 0 0 50 0 0 1 1 1 0 0 0 0 0 0 # City
bglayer data/bgs/ken/ken_0-33.png 0.655 0 0 50 0 0 1 1 1 0 0 0 0 0 0 # City shadow / Water  0.655 0 0 50 0 0 1 1 1 0 1 1 11 2 0

fglayer data/bgs/ken/ken_2-1.png -100 0 0 0 188 0 0 -1 1 1 0 3 0.7 1 0 # Floor parallax z = -100; z in fglayer depends on the height size of the sprite
fglayer data/bgs/ken/ken_0-1.png -100 0.2948 0 -28 161 0 0 1 1 1 0 0 0 0 0 # Barricade; z = -100

panel    data/bgs/dhalsim/panello2.png
order a
notime 1
settime 0
direction both

Chun-Li's stage:
Code:
#### PLEASE USE BOTH THESE IMAGES AS HUD FOR YOUR PLAYER(S) UNLESS IT'S BONUS STAGE #######
fglayer data/sprites/hud_base.png -1 1 0 3 3 1 1 1 1 1 0 0 0 0 0 0 # no. 0
fglayer data/sprites/hud.png -1 1 0 3 3 1 1 1 1 1 0 0 0 0 0 0 # no. 1
###########################################################################################

background    data/bgs/blank.png 0 0 0 0 0 0 -1 0 0 0
bglayer        data/bgs/chun-li/1_0-0.png 0 0 0 0 0 0 1 1 1 0 # Main background
fglayer        data/bgs/chun-li/1_17-0.png -70 0 0 0 0 0 0 1 1 1 0 # Pillar
bglayer        data/bgs/chun-li/1_2-0.png 0 0 0 209 0 0 1 1 1 0 # Floor
direction    both
order        a
settime        0
notime        1
panel        data/bgs/chun-li/chun-li_panel3.png
 

Attachments

  • My Mod - 0826.png
    My Mod - 0826.png
    30.3 KB · Views: 7
  • My Mod - 0851.png
    My Mod - 0851.png
    45.1 KB · Views: 7
  • My Mod - 0852.png
    My Mod - 0852.png
    43.8 KB · Views: 7
Piccolo updated Chronocrash Modders Tools with a new update entry:

CMT 0.4 - Introducing a flexible binding editor (~ grab editor)

There it is, I just finished cooking the first version of the binding GUI, which will be useful in particular for those who want to setup grab animations.

The binding GUI is integrated in the existing entity editor, and includes very useful features such as drag'n'drop positioning with the mouse, real time preview, changing bind entity on the fly, changing animation on the fly, automatic and fully customizable read /write (import/export) from your animations, and more. I'll write more...

Read the rest of this update entry...
 
There it is, I just finished cooking the first version of the binding GUI, which will be useful in particular for those who want to set up grab animations.

The binding GUI is integrated in the existing entity editor, and includes very useful features such as drag'n'drop positioning with the mouse, real time preview, changing bind entity on the fly, changing animation on the fly, automatic and fully customizable read /write (import/export) from your animations, and more.

How it works, the basics :

1 / Open the app, load an entity and go the visual animation editor ("Animation").

2 / In the right panel, there is now a "Bindings" tab. Click on it.

3 / Enter an entity name in the "Entity model" input. When you write a valid model, the input will turn green and the entity will automatically be loaded. If the entity does not show up try to check the box "Show opponent" (not that this checkbox can also be used to hide the bound entity without removing it)

4 / If you want you can also change the animation of the "opponent" entity using the input just below the once you previously changed.

5 / Now you need to create binding settings. Click on the green "+" button to the right of the "Binding settings" group box. This will automatically sync the position of the "opponent" entity with the one of the "player" entity.

6 / Now you can change the position of the "opponent" entity as you please. There is two ways to do it visually : first, you can do it by manipulating the X and Y values on the right. Don't forget that you can use the wheel of your mouse to increase/lower the values. This is great for precise tuning. But you can also drag and drop the "opponent" entity to the desired location. Great for setting up the overall position before fine tuning it.

7 / Direction :
0 = direction stays the same as it was set before.
1 = same as player
-1 = opposite as player
2 = force facing right
-2 = force facing left

8 / Frame = simply the frame within the animation. Not that if you set a number greater that the number of frames within the current animation, it will load the first frame (frame 0) instead.


That's it for the basic stuff. Note that with just this basic stuff, the editor doesn't load or write anything in your files/animations.

That is, without further configuration, the binding GUI is just an independent GUI that doesn't alter or interfere with the files.


So from there you have to manually copy the values, and manually fill these values in your commands, within the text part.

But of course there is a way to automatize this process and make it way more convenient.

I'll explain it in the next post ;)
 
Binding GUI, How it works, the advanced stuff, part 1 of 2 :

Currently the advanced stuff is all about setting up the app so that it can read and write the binding values to and from your custom scripting system (or at the very least read and convert the binding values to and from comments within your animations).

The main thing for that is to create a mask.

Let's say you use a system like this :

Code:
anim grab
    offset 50 50
    @cmd bindEntity 10 20 0 2 1
    frame data/chars/joe/01.gif
    
    @cmd bindEntity 15 -30 0 5 1
    frame data/chars/joe/02.gif
    
    @cmd bindEntity -7 -20 0 3 1
    frame data/chars/joe/03.gif


where your command bindEntity use params in that order : xPosition, yPosition, zPosition, frameNumber, direction.

The mask you'll need to create is this :

Code:
    @cmd bindEntity {x} {y} {z} {frame} {direction}


And you will have to copy paste this mask in the "Text Mask" input in the right panel of the animation editor in ChronoCrash Modders Tools.

And that's it ! Now the binding GUI will load from and to your animations.


If you just want to log the values the principle is the same. For example you can use this mask

Code:
    # CMT binding values : z = {z}; x = {x} ; y = {y} ; dir = {direction} ; frame number = {frame}

Note that you can set up the values in any order you want. To be loaded properly your mask must contain : {x} {y} {z} {frame} {direction}.
But those can be placed anywhere you want within the mask. They just have to be there somewhere.

Any of those 5 parameters that is not in the mask won't be recognized anymore by the GUI.

If you don't use a mask, this warning doesn't apply, as the binding GUI will work independently of any text.

BTW, if you want to make the binding GUI independent again as it was by default, you'll just have to "delete" the text mask in the previously mentioned input. Just replace it with a completely empty/blank text.
 
Binding GUI, How it works, the advanced stuff, part 2 of 2 :

Just by setting up the previously mentioned mask, you can make the binding GUI seamlessly compatible with almost any scripting system.

The mask was already optional, and the stuff I'll explain in this post is very optional. But if your binding system is more complex, this very optional stuff can help make it compatible.

Let's say you are using constants names in your system. For example let's say one of your animation look like this :

Code:
anim grab
    offset 50 50
    @cmd bindEntity 10 20 0 GRAB_DEF DIR_SAME_AS
    frame data/chars/joe/01.gif
   
    @cmd bindEntity 15 -30 0 GRAB_STOMACH DIR_SAME_AS
    frame data/chars/joe/02.gif
   
    @cmd bindEntity -7 -20 0 GRAB_VERTICAL DIR_OPPOSITE_AS
    frame data/chars/joe/03.gif


Where the GRAB_DEF, DIR_SAME, and so on refers to constants pointing to integers.

You can set up the binding GUI so that it is compatible with that, through the "additional translations" input, at the bottom of the binding GUI (right panel).

What you have to write in that is the correspondences of every constant, and which setting they are associated to, in a specific format.

So for example :

Code:
{
 
 'frame' : { 'GRAB_DEF':0, 'GRAB_STOMACH':1, 'GRAB_VERTICAL': 2},
 'direction' : {'DIR_UNCHANGED':0, 'DIR_SAME_AS':1, 'DIR_OPPOSITE_AS:-1, 'DIR_RIGHT':2, 'DIR_LEFT':-2 }
 
 }

And with that set, every value matching a correspondence will be converted back and forth to the constant name :cool:


Final word :

While I didn't encounter many bugs or problems while I was personally experimenting with this new feature, be cautious and don't use this on files you do not have recently made a copy of. Again, it probably won't mess around with your files, but you never know, at this point this new system has barely been tested by me, let alone by someone else.
 
Last edited:
@Piccolo

Great job man, tested the bindings section and worked perfectly as intended. In addition, the mask section adapted correctly to my grab script version.
The only bugs I found at the moment are the ones below.

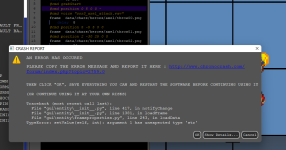
This one happened when I tried to set negative values for frames.
1675752718410.png

As a suggestion, even if the direction really has negative values you could define a limit based on the OpenBOR native bind command (from 2 to -2).
1675752790826.png

This other error happened when I tried to change the direction value at first occurence of the @cmd position function (you can see a red box there showing that I was trying to put -1).
1675752012790.png

As an additional suggestion, once usually most grab moves start with the opponent in an opposite direction from the grabber due to the grab animation defaults, maybe CMT could make the opponent always start with an opposite direction at least on the first frame, except if the modder changes it manually.

But if it can cause complications, there's no problem if we need to change manually, the editor is already doing an amazing job :)
 

Attachments

  • 1675750466000.png
    1675750466000.png
    82.8 KB · Views: 3
  • 1675751393461.png
    1675751393461.png
    65.3 KB · Views: 2
As Kratus said this is very good!

I'm impressed.
2 things I want to know.

1
How to activate transparency of main animation you're watching ?
Right now, only enemy is transparent. (I'm using Matchok's FF mod as a test)
It's hard to see the enmey hidden behind a big pink square of player sprite. ^^;
---> OK seems like Haggar from this mod have pink area instead of transparent when open in CMT, even if there is no problem of display ingame.
What is the reason some files are not correctly displayed (with transparency)
Do you need a sample sprite to check?

2
when moving an enemy, the black border of his picture edges seems to be on different places.
Gives the feeling the character is moving around in his own file surface.
Is it a visual bug?
How to get rid of it. (unless it's a minor bug)

I'm checking the rest of tutorial.
(I suggest these tutorial elements to be included in the software archive - So anyone can access to them easily - even offline etc)

And thanks again for taking this suggestion of adding a binding visual environement without having to launch the actual game ! (y)

And a suggestion.
Not a priority, but for the binding process when selecting an enemy, could it be possible to navigate in the entity list with up and down or mouse wheel?
Perhaps same for choosing an animation.
(Again, no problem if you cannot because it makes things more complex, but I'm still asking because it would make it more user friendly when you have many files and many anims)
 
Last edited:
And a suggestion.
Not a priority, but for the binding process when selecting an enemy, could it be possible to navigate in the entity list with up and down or mouse wheel?
Perhaps same for choosing an animation.
(Again, no problem if you cannot because it makes things more complex, but I'm still asking because it would make it more user friendly when you have many files and many anims)
Actually, this is the reason I didn't do it like this. For mods that are very large the dropdown list would be huge. But I'll think about a compromise.

How to activate transparency of main animation you're watching ?
Right now, only enemy is transparent. (I'm using Matchok's FF mod as a test)
It's hard to see the enmey hidden behind a big pink square of player sprite. ^^;
---> OK seems like Haggar from this mod have pink area instead of transparent when open in CMT, even if there is no problem of display ingame.
What is the reason some files are not correctly displayed (with transparency)
Do you need a sample sprite to check?

Yeah should be on by default. I'll need a frame sample, and a palette sample (if used).

2
when moving an enemy, the black border of his picture edges seems to be on different places.
Gives the feeling the character is moving around in his own file surface.
Is it a visual bug?
How to get rid of it. (unless it's a minor bug)

Yeah I realized that but didn't bother to fix it right now. Will do it later. It's just a visual artifact basically.


(I suggest these tutorial elements to be included in the software archive - So anyone can access to them easily - even offline etc)

Yes that's what I was thinking after posting these. I will create an offline guide integrated in the app.
 
Great, thanks for the feedback. All these suggestions can be added easily I think.

EDIT : everything has been adjusted in the code.
I have not had a chance to read all the posts, but I will when I get more time to play around with your awesome program.
We really appreciate for all your hard work, efforts, and time you spent on it.

We all know it is not easy to create a program like this.......
Again, everyone please support this program and the site,
Please remember, alot of small donations = big, so please do your part, thank you so much for your support.
 
Actually, this is the reason I didn't do it like this. For mods that are very large the dropdown list would be huge. But I'll think about a compromise.


Yeah should be on by default. I'll need a frame sample, and a palette sample (if used).


Yeah I realized that but didn't bother to fix it right now. Will do it later. It's just a visual artifact basically.


Yes that's what I was thinking after posting these. I will create an offline guide integrated in the app.
If your compromise don't give you too much headache, it would be great!

I'm giving you some sample sprites.
In CMT :
Haggar's sprite is pink
Axl sprite is transparent
link :
FromSF89

about the visual artifact. No problem if it doesn't have any ingame effect.
Keep it for later if you have time.

Offline guide would be a good option!
 
Piccolo updated Chronocrash Modders Tools with a new update entry:

Minor updates and fixes

Changelog :

- Added option "Options => Force transparency". I don't recommend it as it will slow down the app a bit, but if you have sprites whose transparency is not normally recognized, it will probably help. Note that the change of this setting doesn't affect sprites that are already loaded. So you better restart the app to not be confused. (@NED )
- Added offline binding tutorial in "Help-> Tips" dialog.

Also includes all the fixes and requests from ...

Read the rest of this update entry...
 
@maxman Thanks, would be great if you (or anyone else) can send me the files or link me to an existing mod that have levels that use a lot of these commands.

Basically, if there is a mod with complex levels that illustrate what some of you want to be supported in the level editor of CMT, link me to it so that I can experiment. It's way easier for me like this.
 
Back
Top Bottom