TBH
nedflandeurse, I think I'm the only person with scripted throws who DOESN'T use
Bloodbane's system - I prefer my own. You should be able to crack open just about any module out there and get some insight.
Not sure what you mean about efficiency though. No matter what throw system you use or build, there will always be the tedium of setting up the individual throws themselves. You just aren't getting around that.
You CAN mitigate a lot (most) of it with good pre-planning. My old grapple system included a real time editor:
https://www.youtube.com/watch?v=QHOBzuCbC8w
...but my new one does
not, and I probably won't ever add one. That's because if you use a single template with all poses across all models, you can easily measure the bind offsets you'll need in Photoshop. Turns out that's a lot faster in the long term than a real time editor. Let me explain how this works:
[list type=decimal]
[*]You need to decide on what reaction poses you have, and how detialed. This just comes down to how much time you want to spend vs. the quality you want to achieve.
Take for instance someone getting a German Suplex done to them. Do you want visible squashing and pain on impact like Street Fighter? Well then, you'll need a vertical head down pose, and then one or more vertical down poses buckling in pain (most games just use the middle pain sprites turned upside down for this, and it works well). Or are you OK with less nuanced animation? Most side scrolling brawlers like Streets of Rage only have a single vertical upside down frame, and they get by with that just fine.
After you decide on all the generic poses you'll use, you also need to consider if you want any specialty poses, like you see in KOF when Blue Mary applies her various Sambo holds. Here's the list of generic poses I use:
- REACT_FALLING_UP_0 - Normal falling, just after initial lift.
- REACT_FALLING_UP_CENTER_0 - Normal falling apex, and beginning to tilt backward.
- REACT_FALLING_UP_LIFT_0 - Normal falling, first knocked into air.
- REACT_FALLING_UP_TILT_0 - Normal falling, tilted backward.
- REACT_HELD_0 - In someone's clench, used when grabbed.
- REACT_HORIZONTAL_DOWN_0 - Lifted overhead while facing down.
- REACT_HORIZONTAL_DOWN_PAIN_0 - Lift up, face down, in pain, as if dropped on stomach, step 1.
- REACT_HORIZONTAL_DOWN_PAIN_1 - Lift up, face down, in pain, as if dropped on stomach, step 2.
- REACT_HORIZONTAL_DOWN_PAIN_2 - Lift up, face down, in pain, as if dropped on stomach, step 3.
- REACT_HORIZONTAL_UP_0 - Same as horizontal down, but face is pointing up.
- REACT_HORIZONTAL_UP_PAIN_0 - Lift up, face up, in pain (ex. back breaker impact), step 1.
- REACT_HORIZONTAL_UP_PAIN_1 - Lift up, face up, in pain (ex. back breaker impact), step 2.
- REACT_HORIZONTAL_UP_PAIN_2 - Lift up, face up, in pain (ex. back breaker impact), step 3.
- REACT_LAYING_UP_0 - Laying on ground.
- REACT_LAYING_UP_PAIN_0 - Laying on ground, in pain (ex. hit with down attack), step 1.
- REACT_LAYING_UP_PAIN_1 - Laying on ground, in pain (ex. hit with down attack), step 2.
- REACT_LAYING_UP_PAIN_2 - Laying on ground, in pain (ex. hit with down attack), step 3.
- REACT_PAIN_0 - Normal pain (head/upper body) - step 1.
- REACT_PAIN_1 - Normal pain (head/upper body) - step 2.
- REACT_PAIN_2 - Normal pain (head/upper body) - step 3.
- REACT_PAIN_MID_0 - Normal pain (torso/lower body) - step 1.
- REACT_PAIN_MID_1 - Normal pain (torso/lower body) - step 2.
- REACT_PAIN_MID_2 - Normal pain (torso/lower body) - step 3.
- REACT_TILT_DOWN_0 - At 45' angle, with upper body pointing down. Think last step of most long distances throws just before release.
- REACT_TILT_FORWARD_0 - At 45' with feet pointed down, as if toppling forward. Think first step of most shoulder type throws.
- REACT_TILT_UP_0 - At 45' angle feet down, toppling backward. Pushed off balance or being pulled into a German Suplex.
- REACT_VERTICAL_DOWN_0 - Turned upside down. This is gonna hurt.
- REACT_VERTICAL_DOWN_PAIN_0 - Slammed on head/upper body, step 1.
- REACT_VERTICAL_DOWN_PAIN_1 - Slammed on head/upper body, step 2.
- REACT_VERTICAL_DOWN_PAIN_2 - Slammed on head/upper body, step 3.
- REACT_VERTICAL_UP_0 - Lifted by neck or popped straight into air by a powerful uppercut.
These are great for me, but again, this is just a matter of deciding what is best for your project and effort balance.
[*]Once you decide on the reaction poses you'll need, build a template that includes all them, using a standard offset. The template should be a mid sized character compared to the others in your project. For me, good ole' Ryu works perfectly. Alignment of each pose compared to the others is important here. For "standing" reaction poses, I line up the sprites normally. For "lifted" and falling poses, I place the sprite's center line (usually the belt area) on its offset. There are advantages and disadvantages depending on how you choose to align the sprite vs. offset - the important part is whatever alignment you choose, you do it consistently.

[*]When done, save these poses as sprites using your chosen fighter's base palette - the same as you would any other sprites. I highly recommend you apply a standard naming convention to reaction sprites for every model, and use one that will keep the reaction sprites grouped together when mixed with other sprites. Once this step is complete, your character has all the sprites he needs to get thrown!
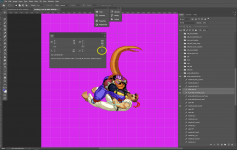
[*]When it comes time to make pose sprites for the next character, now you can use the template. Utilizing layers, your template's character acts as a guide to line up the poses for the new character (see screenshots), and then you save them as sprites too. Because you've already done all the hard work up front building a template out of one character, all the other characters are a breeze!
[*]One last touch - add another layer to your reaction poses, and in that layer, mark the offset location. Now you are ready to build a throw!
[*]Head over to the working file for your throwing character. If you haven't already, make a layer that marks its offset too. When you want to build a throw, all you have to do is copy the offset layer and pose layer from your reaction template. Again using layers, overlay it with the throwing pose (see screenshot). Now you know exactly what offset you need for binding. Again, since you've already done the hard part up front, this step is very quick. In the SS example, when I place the reaction pose where I think it looks good, I can see it's 11 pixels behind and 7 pixels above the throwing character, and I also know which direction to bind in.
[/list]
Once the last step is complete, you can perform this throw on any character with the standard reaction poses, and it will look the same. There's no need to go back and forth loading and unloading the game to test. Building that template is the key - do it right once, and everything else will more or less take care of itself.

DC




 ) But It's possible to code it now. I restarted it again from scratch.